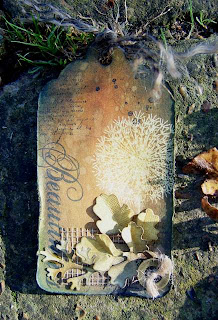
This week I thought I would try and show you how I made the leaves for this tag
 I'd had the punch knocking around for ages, but never used it for some reason - then I was inspired to have a go when Carolyn, the creator of Tag Tuesday, gave us the theme of Autumn Leaves and Berries ... in the end I was so chuffed with how the leaves turned out that I just stuck them on a rescued clothing tag and left it there!
Here's what you need too make realistic autumn leaves


Punch out or die cut lots of leaves (see my shadow? My photography is so bad this week - even worse than usual! )
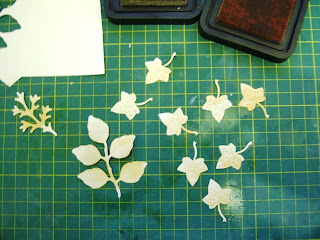 Starting with the palest colours first, start to randomly apply layers of Distress Inks all over the leaves, allowing the colours to blend into one another - I started with Scattered Straw (warm yellow) and Antique Linen (pale beige)
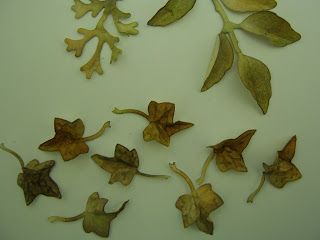
 Gradually deepen the colours - I went on to Spiced Marmalade (deep orange) and Peeled Paint (dull green) and finished with Walnut Stain (dark brown).
Then spritz with water and gently start to fold, shape and crumple the leaves
 Leave to dry (or help along with a heat gun as I do) and as they dry they will hold the crumpled shape
 Then you can go back in and deepen the colour with more orange and brown if you like and Presto!
Here are some more pictures of tags using these leaves

Of course the same method would work for summery foliage, but with more folding and shaping and less crumpling.
Thanks for looking, hope you find it useful :o)

Here's what you need too make realistic autumn leaves

- Scrap card or heavyweight paper (patterned scrapbook paper works well)
- Punch or dies to cut the shapes (I have also made some by stamping leaves and cutting them out)
- Distress Inks in autumnal colours (I used Spiced Marmalade, Peeled Paint, Scattered Straw, Antique Linen, Walnut Stain)
- Stencil Brushes (I keep three on the go - largest for pale, middle size for medium and small for dark colours - but use whatever type of applicator you are comfortable with)
- Water Spritzer (mine is a Ranger Mini Mister
Here's what you do

Punch out or die cut lots of leaves (see my shadow? My photography is so bad this week - even worse than usual! )


Then spritz with water and gently start to fold, shape and crumple the leaves


Here are some more pictures of tags using these leaves


Of course the same method would work for summery foliage, but with more folding and shaping and less crumpling.
Thanks for looking, hope you find it useful :o)
Comments